Thursday, May 1, 2014

Grilled Cheese Croutons: a better solution for sandwich crusts

"I'm done!" says the daughter, and takes her dishes into the kitchen.

I look at the counter and see a quarter-cup full of milk, and a plate with grilled cheese sandwich crusts. This is not what I would call "done," but I did grow up encouraged to be part of the Clean Plate Club. My children have no interest in membership in that group.

My usual choices are:
1) Toss the scorned crusts (with regret) instead of eating them as my second lunch.
2) Eat the rejected crusts (with regret) so I don't feel guilty about wasting them.

Also up for consideration:
3) Insist that the child eat the crusts before leaving the table. However, neither one of us has the patience or stomach for that.
4) Put the crusts out for the birds. But then I worry that the birds shouldn't eat cheese.
5) Save a week's worth of crusts to make a savory bread pudding. I'd probably be the only one to eat that, so why bother?

Today I see something I have not seen before, despite the uncounted sandwich crusts left on previous plates. I see ... croutons. Grilled cheese croutons! (Someone should market this.) 

(Looking again...does the word crust come from crouton? Croûton, perhaps? I had to look it up, the French for crust is croûte.)
Leftover lunch for lunch, made slightly appetizing
I throw together a salad dressing of (store-bought) hummus, olive oil, and vinegar. Make a lazy salad of baby carrots, grape tomatoes, pepperoni, and greens. Top it with the grilled cheese croutons. Eat. Feel slightly virtuous for having had a salad for lunch and not letting those crusts go to waste.

Grilled Cheese Croutons

2 slices of sesame seed Ezekiel Bread (or your favorite, crusty bread)
2 slices of Kraft American cheese (no comments, please, I already know)
1 tablespoon butter (you can use less, of course, but we like butter)
1 child (This is an important, if unconventional, element of this recipe)

  1. Over medium heat, melt butter in skillet.
  2. Place on slice of bread in melted butter, rotate to distribute butter over the surface of the bread, then place it (butter side up) on plate. 
  3. Place second slice of bread in the remaining butter in the skillet, rotate to coat.
  4. Put cheese on bread in skillet.
  5. Place first slice of bread (still butter side up) on cheese on bread in skillet.
  6. Press sandwich together with spatula or utensil of your choice.
  7. After cheese begins to melt, flip the sandwich over. Continue cooking, flipping again if necessary, until golden brown on both sides.
  8. Cut into quarters and serve sandwich to child to eat the best part of the sandwich.
  9. When child is done, roughly cut remaining crusts into squares. These are your croutons. 
  10. Use croutons to top a salad, throw them in the garbage, or feed them to the birds. 


Monday, April 14, 2014

Be a sister to every Girl Scout: Australian edition

We had the good fortune to host a traveling, homeschooling, scouting family from Australia at our Girl Scout meeting last week. The girls are Junior and Brownie age, and their dad is a troop leader. Though perhaps he is a "pack" leader as their scouting experience is co-ed...but never mind, the important thing is that we got together for what we called a "Sharing Sisterhood" meeting.
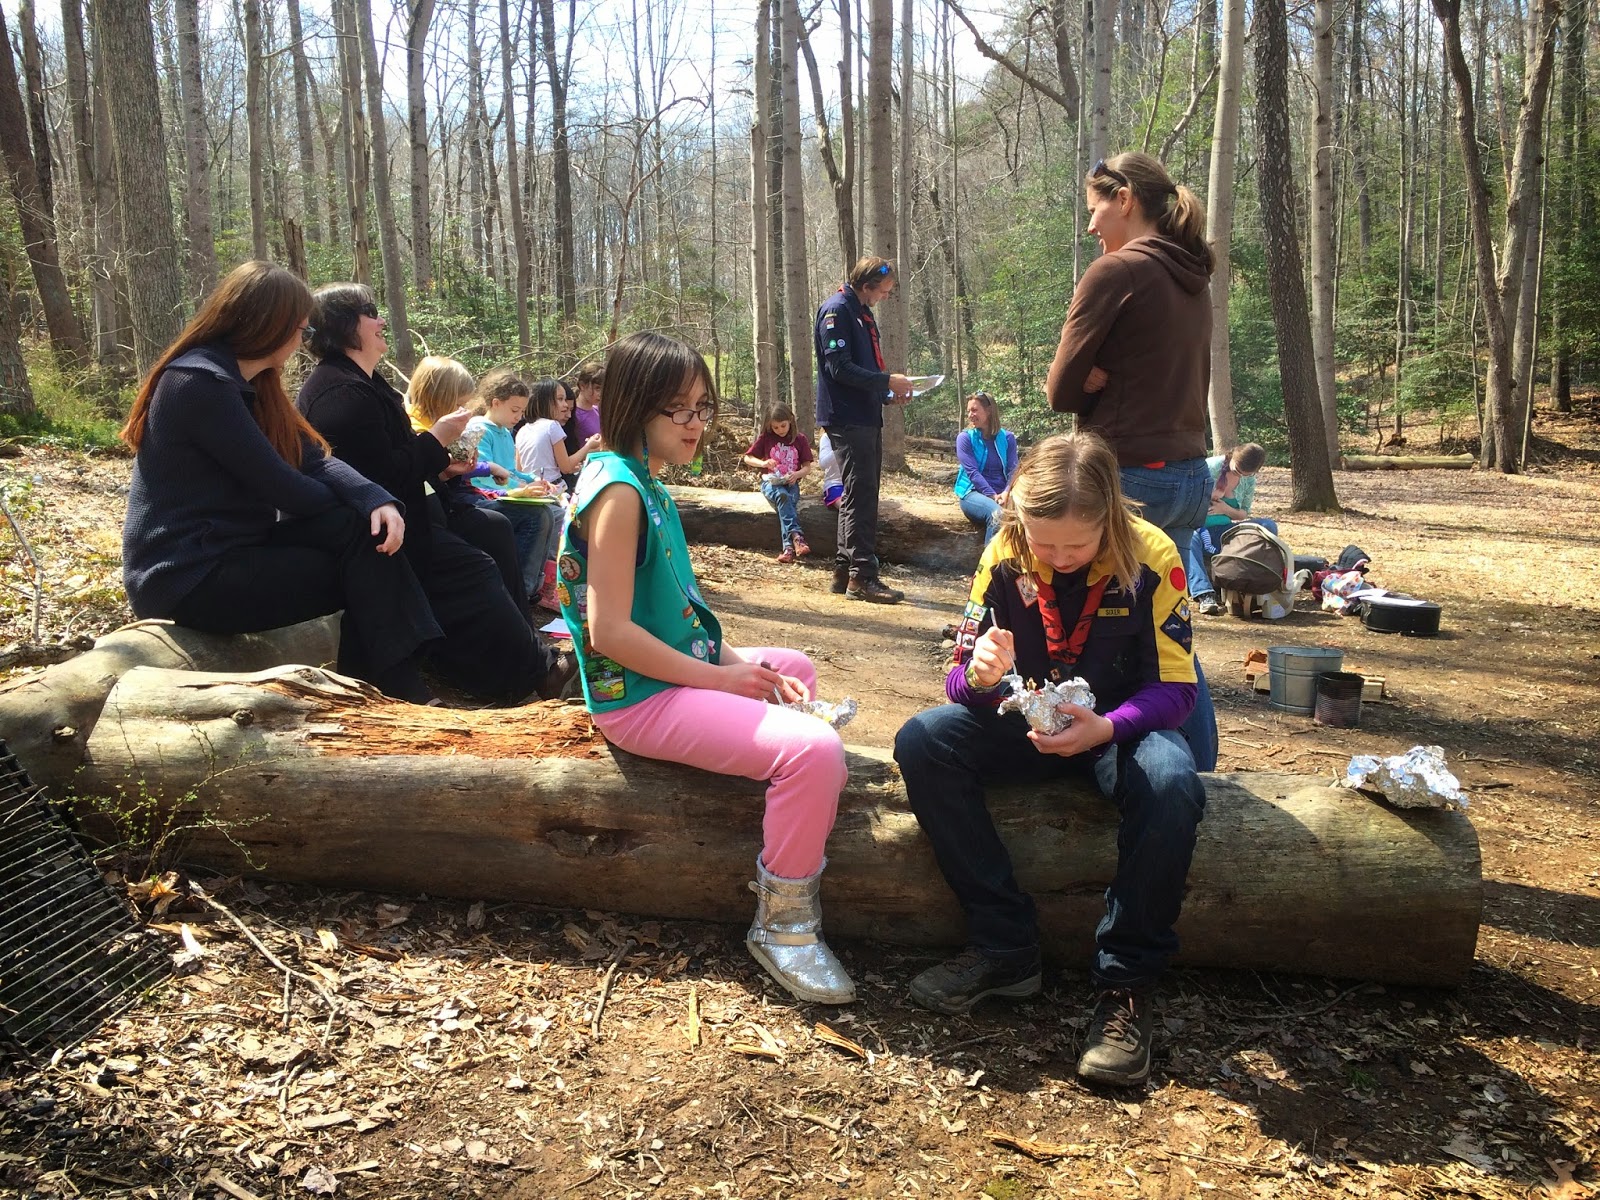
17 Girl Scouts, 2 Australian Scouts, 3 leaders, a few moms, and baby siblings attended "Sharing Sisterhood."
The general idea was to share songs, games, and snacks from our different scouting traditions. My troop's choices seemed to follow a theme: bananas! Or, as the Aussies say, bah-nah-nahs. The girls had chosen two action songs, "There's no bananas in the sky" and "Peel banana." They had voted also to build a campfire instead of go on a hike, and to make banana boats instead of s'mores.

The visiting girls shared an Australian classic, "Kookaburra," which is popular in the US. One verse was new to us, and made us all laugh:

Kookaburra sits on the electric wire,
Jumping up and down with his tail on fire.
Ouch, kookaburra, ouch, kookaburra,
Hot your tail must be.

They taught us to sing it as a round, which we had not done before. 

I asked for clarification about the pronunciation of the bird's name: that first syllable is more like "cook" (rhyming with book, look, and took) than "kook" as in going bananas. Speaking of which, that crazy bird has a fabulous, hooting guffaw, which the Aussie dad demonstrated for us.


The Australian scouts also shared a game they learned from Italian scouts in Venice which, oddly enough, is a traditional English one. The song is "Do you know the muffin man?" played as a circle game. Most of my girls knew the words and tune, but the game was new to us, and was appropriately kooky and fun.

Next up was the Yes/No game, the source of which I can't remember. It's a good icebreaker and get-to-know-you game that gets kids moving. We mark one spot as "Yes" and another spot as "No" and place the "caller" in between. The caller shouts a question, and girls run to the appropriate spots to indicate their answers. For example, "Do you have a brother?" followed by "Have you traveled out of the country?" followed by "Do you have a pet?" gets the girls running back and forth. The girls often take turns in the role of caller, and sometimes even the quietest girl gets in on it when she asks someone else to shout out her question.

After these activities, we assembled our banana boats and put them in the coals of the campfire that Taryn and her new Aussie friend had built before the meeting. While the snack cooked, one of my co-leaders played guitar and led the group in a couple of songs.
Some music to pass the time
It was important to remember where you put your banana boat!
Messy banana boats!
After cleaning up, the Australian family shared pictures of their backyard wildlife: koalas, kangaroos, and goannas. In their picture, the goanna had found its way into their bathtub, and was not outside where he belonged!

To officially end the meeting, we got in a circle and did the "Weave," which has replaced a friendship squeeze as my troop's favorite closing activity. We gave each of the visiting girls a card that the troop had signed, a patch, and a bookmark with the Girl Scout Law and Promise. The Australians gave our girls patches, too!
Our council's new patch is so pretty!
There was some free form play, of course, given the setting. It was the warmest day of the season (up to that point!) and we were in a clearing in the forest beside a creek near a teepee. Some girls may have gone home with wet feet and mud on their clothes. We all smelled of campfire, I'm sure. To me, those are signs of a good meeting.
Taryn and her new friend
My favorite part of the day was making these new friendships. The connection is definitely not a one time deal! My girls found kindred spirits in the Australian girls, and they have exchanged emails and photos since our Sharing Sisterhood meeting. Beyond that, my family met up with them again to enjoy the cherry blossoms downtown -- but that is another blog post.

This event was one of my favorite moments in our troop's year! It gave the girls an opportunity to reflect on their favorite parts of scouting, and they were happy and enthusiastic to share them. All in all, I'm so happy that our troop embraced the opportunity to live out that last, but not least, line of the Girl Scout Law:

Be a sister to every Girl Scout.


Sunday, March 23, 2014

A journey of a thousand miles begins with a Pinterest board: Iceland travel planning (Part 1?)

I picked up the Travel section of the Sunday paper last weekend. My eyes landed on the weekly roundup of land, sea, and air deals. "We haven't been overseas for almost a year," Zed observed.

"Iceland Air is offering a package deal for a long weekend in Reykjavik for less than the cost of a roundtrip ticket," I replied.

"What, are we going to Iceland now?" asked Kathy, with a precocious eye-roll. She's only 8, but she's got the skills of a fourteen year old.

Just so you don't think we are impulsive, our answer at that moment was a good, solid maybe

A few hours of research, comparison shopping, and soul-searching later, our answer had morphed into yes

You say impulsive, I say decisive. 

Or maybe it was the post-coffee-and-waffle high.


The first time I planned an overseas trip as an adult was in 2010. Back in those dark ages, there was no Pinterest. I did Google searches, and jotted down info on sticky notes, and stuck them on a map.

Four years later, my first step in planning a trip is to multitask with Pinterest, Google, Facebook, Flickr, and Spotify. I've got indie Icelandic music streaming as I search blogs, tour companies, and Wikipedia. I've added movies filmed in Iceland to my watch list  on Amazon Prime. YouTube has Icelanders teaching basic phrases in their language. I stick pins on a Google Map that I made for the trip.

I also use the relatively old school online library catalog -- within minutes I can put holds on as many books on Iceland's culture, geography, and tourism as I want. When I go to pick them up, there will be an entire shelf of books tagged with my name.

This is going to be a self-referential post: when I publish it, I'll pin it to my Iceland board. I haven't quite figured out what the organization standard is on Pinterest. Should I use hashtags? What works for me is to put the name of the country first, then the city (if it applies), and then a phrase reminding myself what I liked about the site.

It turns out that going to Iceland is not so impulsive. My husband just found an email I sent him two years ago with a link to a company that does family tours of glaciers, geothermal pools, and volcanoes. So maybe the journey does not start with a step, or a Pinterest board. It starts with a dream of horseback riding through lava fields "someday."

Iceland! I can't wait to see you.

Saturday, February 22, 2014

Homemade pizza improvements: HOT oven and cornmeal for rolling out dough

The girls' pizza: half cheese and pepperoni, half pepperoni and olives

We've been having fun with homemade pizza. As much as we love our local chain's pies, it is more economical (and sometimes even yummier) to eat in. Responsibility for pizza night has switched from Zed ordering online and picking it up, to me making pizza from scratch.

As with just about everything, the key to pizza success is in the preparation. Before making the dough, preheat the oven to 500 degrees Fahrenheit. In our house, we have a cast iron pizza "stone" which I give at least an hour to get to temperature. During that time, make the dough and let it rest and rise.

(Go watch the Olympics, or do something fun while you wait.)

After the oven is hot, and the dough has doubled in size, spread out a square of parchment paper and sprinkle it with cornmeal. Flour will work if you don't have it, but Kathy wants you to know that it tastes better with cornmeal.

Roll out the dough, brush it with olive oil, and finish with your favorite toppings. Kathy likes to help with this step. Her favorite part is spreading olive oil and tomato sauce to the edges.

When ready to cook, transfer the pizza (on parchment paper still) to the hot stone. In our oven, it bakes to crusty perfection in 12 minutes.
The grown-ups' pizza includes spinach (and sometimes blue cheese)

My dough recipe:
2 1/4 Cups all purpose flour
2 Cups white whole wheat flour
1 1/2 teaspoons salt
2 tablespoons olive oil
2 teaspoons yeast
1 3/4 Cups warm water

  1. Set up stand mixer with dough hook. (You can do this all by hand, but I prefer not to.)
  2. Combine dry ingredients and olive oil in the mixer's bowl. 
  3. Add the warm water.
  4. Turn the mixer on low to combine the water and flour mixture.
  5. After all the water has been absorbed, turn the mixer's speed to medium and let the machine knead the dough for five minutes.
  6. Remove the bowl (with dough in it) from the mixer. With oiled hands, form the dough into a ball, replace it back in the bowl, and cover the bowl with a kitchen towel.
  7. Let the dough rise until it doubles in size, about one hour. Could be less, could be more. 
  8. Finish your pizza as above. If it isn't to your taste the first time around, make some tweaks to the process next time. Let me know what works for you!
*****
I do take a shortcut with the pizza sauce, but only because we found a great tasting one in a jar. That's why I could take that hour to relax while the dough was resting. This is the one we like:


Sunday, February 16, 2014

Most-fun-ever chicken noodle soup

It's been cold and snowy, and Kathy has been asking for chicken soup. While she's a big fan of Panera's chicken noodle soup, she hasn't been enthusiastic about my weak and basically flavorless broth. 

Last year when a friend's kitchen was scented with a most heavenly soup, I asked for tips. "Time. Let it simmer until all the goodness is in the broth." The next time I had a chicken carcass, I plopped it in my largest pot with an onion, carrots, celery, and bay leaves and covered it with water. It started in the morning and cooked all day. Hours and hours of simmering led to the best chicken broth I had ever made. Success! 

I hesitated to use this method again because I would need to be home to babysit the stove. I wanted a method with which I could leave the house. Another friend had success with making the stock in a crock pot. Brilliant! 

During our recent big snow storm, we had a roast chicken. After dinner, I set up the slow cooker, turned it on low for fourteen hours, went to bed, and woke up to a most comforting aroma.
Chicken carcass, carrots, onions, sage, peppercorns, bay leaves, water
This same friend with the crockpot idea mentioned making homemade noodles, and what a fun project it was with her daughter. The conversation reminded me that I have a pasta maker in my pantry -- the same one my parents used to make noodles with me when I was little -- that I haven't used for a few years. 

"Taryn, would you like to make pasta with me?" 

Is that a question? 

2 cups of flour, four eggs. Probably more fun to just do this on the counter by hand.
The recipe couldn't be easier with only two ingredients...plus some time and effort.

After an hour, divide up the dough. Clamp the pasta machine to the counter, and get started.
The crank turns a pair of rollers that start out about 1/4 inch away from each other. Process the dough by feeding it through the rollers a series of times. Move the rollers closer to each other each time, and eventually the dough is a paper-thin sheet.

Cutting the noodles
Now crank the sheet of pasta through the cutter of your choice. Kathy likes fettuccine sized for her chicken soup.

Noodles hanging out before going into soup
This noodley gadget is useful, but not necessary. My parents would lay the noodles out on dish cloths on the dining room table. I prefer not to do this because I have three curious, mischievous, thieving cats.

Taryn as noodle walrus
We had fun making noodles!
Kathy-approved chicken noodle soup
Final steps for most-fun-ever chicken noodle soup include:
  1. Strain the broth from the solids.
  2. Put the broth in the snow to cool down quickly.
  3. Skim the fat that has risen to the top.
  4. Saute onions and carrots in a big pot, then add broth and bring to a boil.
  5. Let soup simmer until veggies are soft.
  6. Break noodles into 2 inch pieces, add them to the soup. 
  7. Fresh noodles cook fast! After two to four minutes, this soup is ready to serve.
  8. Enjoy!


Wednesday, February 12, 2014

Snow Day!

I remember the excitement of snow days when I was a kid. The best ones were the surprises: waking up to inches of snow piled up outside my window and knowing -- without turning on the radio or tv -- that school would be out for the day.
View from our back door at 6:30am on our snow day!
(I love how snow changes the shape of familiar objects. )
But still there was a thrill of waiting to hear my school system named, among the long list in the DC metro area, as one that would be closed. My parents listened to WAMU for the news, I would turn on Channel 4 and wait for Bob Ryan to make the announcement. Then I'd do a little dance, and head over to my best friend's house to make blueberry pancakes before a day of sledding.

Snow days are different for my kids. It's not just the easy access to information via internet. Facebook, Twitter, and alerts through the local government take all the suspense away. Worse for my homeschooled girls, they don't even know the thrill of the announcement of No School. Since there's no commute, we carry on with "school" as usual.

This winter has been rough for Taryn and Kathy, as they hear about other kids getting out of school for extreme cold, threats of ice, and snow that may or may not be enough to prevent driving to the fabulous sledding hill in another neighborhood. Their routine has remained the same: get up, eat something, do some work, then play. 

Which, to a kid who goes to school, might sound pretty great. But that's another story.

Our school system has already announced that tomorrow is a day off. Our schooled friends are probably rejoicing. From Facebook comments, I can see that their parents have mixed feelings about yet another snow day. At our house? Deep sighs. "I know it will be just another normal day," Taryn muttered.

So maybe it won't be. Maybe I'll call it a snow day, too. We will shake up the routine and play hooky from homeschool. 

Do I tell them tonight? Or wait until morning when they see the snow piled up outside their window?

Either way...Snow day! I'm excited, too.

Sunday, February 2, 2014

Planning a Court of Awards: "Ask the girls!"

If you are a Girl Scout, have been a Girl Scout, or have a daughter who is a Girl Scout, you will recognize that the Court of Awards is an important event. Even if you have no affiliation with the Girl Scouts, the name makes that clear. Our girls planned out their most recent Court of Awards, and it was the most charming, sweet, and unique party. No perfection required.

From decorations to food to opening ceremony, the girls decided how they wanted to celebrate their accomplishments, and gave themselves the assignments for how to contribute to the party. For the first time, all my co-leader and I had to do to prepare for the event was get the awards ready. The girls did the rest.

A selection of awards, badges, and patches the girls earned
At the planning meeting, the decorations patrol came up with the idea of making garlands from materials they already had at home. The results were really cute, from paper chains, to green and white tassels, to G-I-R-L-S-C-O-U-T-S spelled out on "badges," to chains of paper dolls.
Decorations over the fireplace
High fiving for a job well done
The ceremony patrol planned a traditional opening with a surprise twist. After the seriousness of saluting the flag and reciting the Girl Scout promise, they would break into song and throw confetti. Their "homework" for the party was to make a bag of confetti (using materials from home, natch), and to cut out paper bananas to throw, because, as the song goes, "There's No Bananas in the Sky."

Banana on the floor, not in the sky
The food committee was kind of funny -- if there was a theme, it was "bring something you like." Their table had fruit, veggies and dip, oatmeal cookies, potato chips, and Doritos, so it turned out well. One thing we will work on next time is being more allergy-friendly. When the grown-ups do the planning, it is a lot easier to make sure all the food is safe for all the girls. For this celebration, we made sure to send the girls with allergies through the line first to avoid cross-contamination of safe with unsafe foods.
Good selection of party food
The day of the Court of Awards was cold, and a fresh blanket of snow covered the camp. Our car was the first to drive in, and we followed animal tracks up the road, leaving our tire tracks behind. The girls and I built a fire in the lodge, turned up the thermostat, and did not have long to wait before friends showed up.

As the meeting started, the patrols cycled through stations: getting ready for the party, working on the World Thinking Day poster about Pakistan, and making posters for their cookie booths.

The ceremony went smoothly, the party was fun, and everyone helped to clean up! I'm so proud of the girls and their all their accomplishments.

That was fun!
***********************************************
Bonus feature:  I wrote this up to help the troop parents and others in our Service Unit.

Where do all those awards, badges, and patches go?

Quick answer:  Awards on the front of the uniform, patches on the back.


When in doubt, consult The Girl’s Guide to Girl Scouting, or visit this website: http://www.girlscouts.org/program/basics/for_volunteers/where_to_place/

Long answer (with lots of important details):


Journey awards receive prominent display on the uniform. On a vest, they go on the left front (same side as the membership pin), near the bottom edge. On a sash, they go on the front underneath the other insignia.


Badges also go on the front of the uniform. On a vest, they go on the right front (same side as the troop insignia) applied from the bottom edge up. On a sash, they go below any Journey awards.
  • Girls should be able to talk about some of the things they did to earn any badge on their uniform.
  • Girls who regularly attend troop meetings and events will earn badges along the way.
  • Some girls enjoy working on badges on their own, and will have lots of badges on their uniforms.
  • If your daughter needs guidance about how to earn a badge, please talk to a troop leader. She will be happy to help you out!


Patches always go on the back of the uniform. Generally these are given to recognize a girl’s participation in events, because sometimes just showing up is hard! Encouraging girls to honor commitments is why our troop gives participation patches. Visit http://www.girlscoutsnyc.org/blog?p=223 to read about why one Ambassador Girl Scout is proud of her participation patches.


The Honor Troop patch is an exception, as it is an earned award that goes on the back of the uniform. The Council recognizes troops that go out into the world and do what Girl Scouts do, like community service, going on fun trips, doing outdoor activities, and selling cookies. For the application, see: http://www.gscnc.org/files/pdf/leader/c310.pdf
  • Place this patch in a prominent place on the back of the uniform.
  • Leave room for the “rocker patches” that indicate the year of the award.
  • This patch will move from uniform to uniform as the girls grow through the program. Girls who “fly up” from Brownies to Juniors, for example, will remove the patch from the one uniform to place on the other.


The Early Bird patch is another award the troop earns. Before the end of the school year, we start making plans for the next one. When we commit to each other (and to the Council) that our troop will be active and ready to have fun in September, we earn this award.
  • At least half of the current troop needs to register early.
  • Girls who register early earn the award and a rocker patch for the year.
  • Follow the guidelines as for Honor Troop when you place your Early Bird patch.


Sunday, January 26, 2014

Murder in the Microwave

Or: How I Would Rather Read Than Do Housework

I made a big batch of chili at the beginning of last week, and, as the days went by and leftovers were consumed, the microwave began to look...disturbing. Someone forgot to use a cover when reheating a serving of the tomato based chili, and then the next person figured there was no point, and so on. The splatters accumulated, streaking down the side walls, pooling on the rotating plate, dotting the ceiling. It looked like a horror show. I was alarmed, and I have a high tolerance for living with dirt.

I considered showing a "before" photo to go with this post. But who wants to see someone else's dirty microwave? So here is the "after" pic:
The I Hate to Clean method of cleaning the microwave
I give credit for the pristine state of the microwave to my mother-in-law's method. There is no elbow grease required, which makes cleaning the microwave probably my favorite chore. Total time is about 22 minutes. 20 of those minutes you can read your current book. "Leave me alone, I'm cleaning the microwave," will not be believed, yet it will be true.

  • Put two cups of water in a microwave safe dish. Add a slice of lemon. 
  • The next step will vary depending on your microwave -- you will want to keep an eye on things the first time around -- turn on the microwave for ten minutes on high. The water will boil and boil and boil. About a cup of water will become steam. 
  • After the ten minutes is up, resist the temptation to open the microwave. Let the steam stay in there for another ten minutes.
  • Now you can open the microwave. Carefully remove the water vessel (it will still be hot), and the rotating plate, if you have one. Use a rag to clean the sides, ceiling, and floor. Wipe down the plate, wash with soap and water if you like. Replace plate in microwave. 
  • Admire your work. Go back to your book. Pretend it was such a chore that you simply cannot do another one today.

The lemon slice is important here. It doesn't have to be a lemon. It could be a lime. It could be a toothpick. Something has to go in with there to to prevent the water from superheating and exploding. Really! DO NOT use this method with plain water. I did accidentally superheat water once, and I count myself very lucky that the explosion happened before I opened the microwave door. Lemon, however, makes the microwave smell nice.

PS You do not have to read a book during those twenty minutes. You could surf the web and watch cute cat videos, like this one, instead. Or meditate. Whatever you choose, relax! You're cleaning the microwave!